

So on with the panelling. Tim and I managed to have a good session on the car on New Years Day. Here are some pics of the process.
First up, we make the panel out of card. This takes ages for a complicated panel.

Next we transfer the template on to the aluminium. We've started using ballpoint pen on the Aluminium. Generally it works pretty well. It gives a nice thin line, but can be a little bit tricky to spot when cutting out the panel.


Next we cut out with a jigsaw. We've glued some vinyl to the underside of the jigsaw to stop it scratching the aluminium. We also use a bit of WD40 to help it slide.

After that it's off to the bending brake. We have an 800mm one. I keep forgetting to take pics. This complex panel wouldn't fit for this bend, so I had to make a DIY bending brake.


In the end it worked out pretty well.


However, there's one problem... We never realised this would leave a very large gap between the panel and body shell.


Previously the front of the car looked like this. There was no inner guard at all! The road grime would have flicked straight into the front of the door. That would explain why the doors are so dirty in that region. I guess this is one the many downsides of an old GT40 kit.

The photo below shows a modern kit. This one in particular is a GT Forte (thanks to Andrew on the GT40 forum).
Notice the outer edge of this wheel arch panel extends further outwards than ours. I still haven't figured out if these panels seal against the hinged body on a modern kit or if there is always a gap. We'll have to give some thought about how we fix this gap on ours. I guess we have the options of extending the steel work further and making new panels, making an extra aluminium panel that extends into this region or fibreglassing a guard into the body work. You'll see what I mean about this in the pictures below.
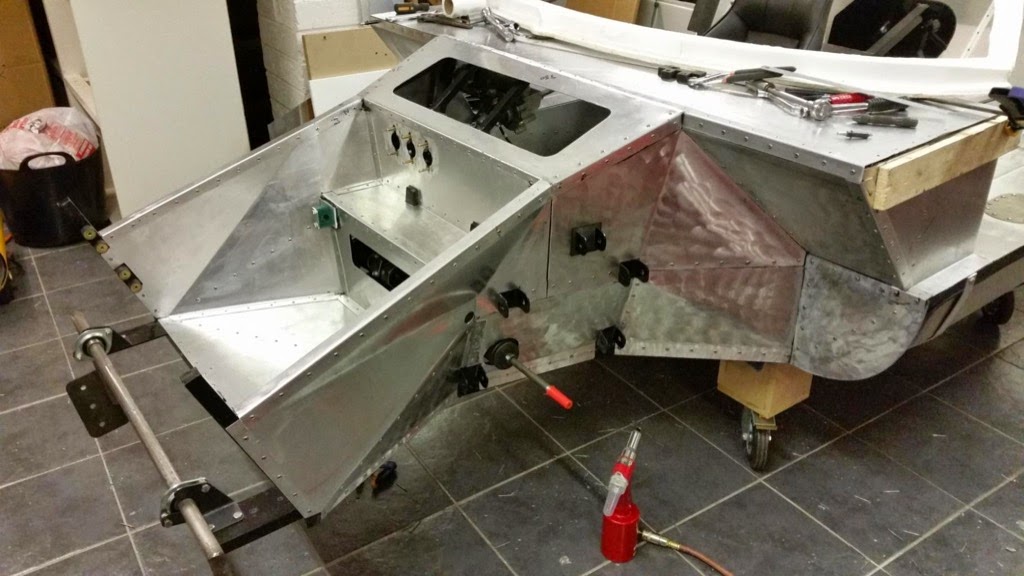
Anyway, moving on... Here are some more pics of Tim's work on Thursday. He's finished off all the driver's side panels.


On Friday, Tim spent another day working on the car (unfortunately I had to work). Tim tackled the large panel in the wheel arch (behind the one shown above). Unfortunately Tim packed the car away before I could take photos. Here are a couple I squeezed through the wheel arch.


I'm pretty happy with how this has worked out....

The blue piece is attached to the hinged body work. On our KCC kit car, the body panels have inner wheel guards already fabricated in fibreglass. This is what you can see in blue above. The bonus of this is that you don't need to encase the whole front end in Aluminium. The blue fibreglass in the picture above was trimmed back quickly when we did the steel work. I'm quite happy with how this has mated up to the aluminium panel. It'll need a bit more tidying at a later date, but it's a good start. One option would be to do something similar for the panel behind the front wheel.
Anyway, that's enough from me.
Thanks for reading.