You may remember in my last update that we were reassembling the engine. A few people recommended that we check for the 'secret' oil gallery plug below the rear main seal. Dad drew the short straw and took the time to remove the sump and check. Fortunately we found it was already in place. Thanks for the heads-up guys. It's good to check these things...
Chassis Improvements
Now on to the fun stuff... The main aim here is to improve rigidity of the chassis and to make the panelling look better. For those who forget, this is what the panelling used to look like...
First job, was to install cross-pieces under the footwells This is a real hollow section of the car.

Next up, rear bulkhead supports and a cross bar that may eventually be used as an anchor point for racing harnasses ;-)

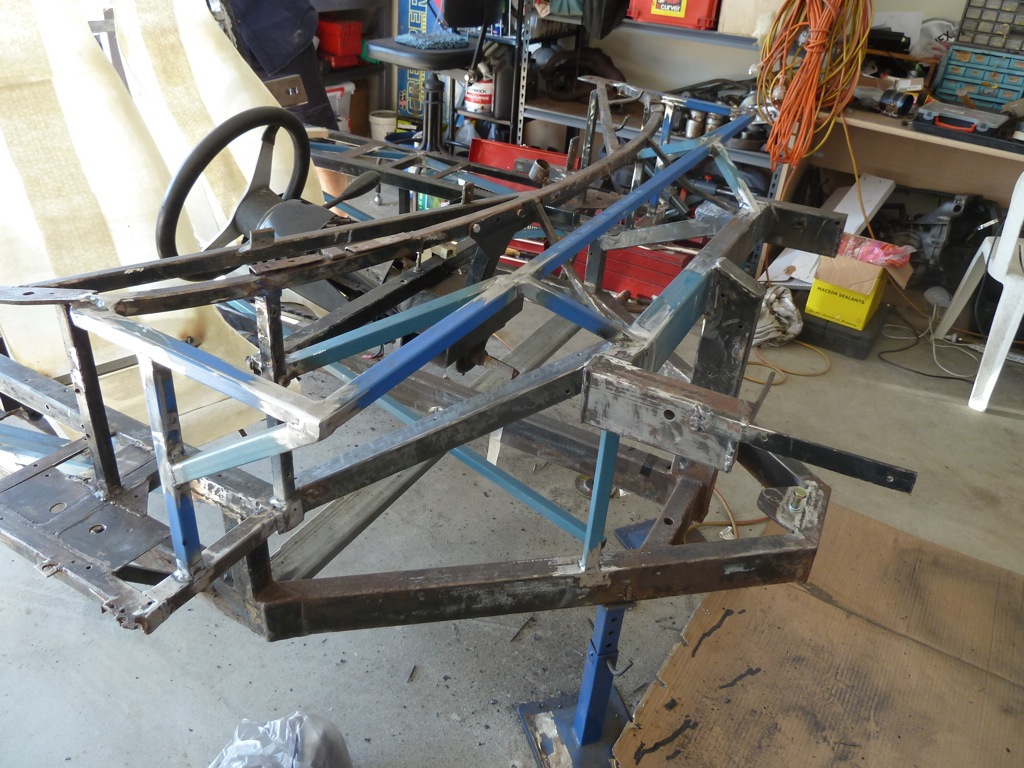
Following that, our attention turned to the section in front of the windscreen. After studying other GT40 chassis, we decided to square off this section with a new cross bar in 20mm box section. The plan was to cut a panel to shape and sandwich it below the windscreen (bolts down on the curved piece). However, we discovered this will be a bit tricky since the curved section also bows upwards, as you can see in the second pic. I guess this is to match the shape of the fibreglass body, so we're reluctant to tamper with this too much. We're still deciding what we'll do here. Either a. maintain a panel that is parallel with the blue bar and sits below the curved bar or b. use a thin sheet that can be shaped to sit on top of the curved bar. For option a, we would fibreglass the area below the windscreen to tidy it all up nicely. Yet to decide on this one...


Righto, so this is the idea for the wheel arch. Quickly mocked up out of cardboard and wood by Tim. We're also allowing space here for fuel fillers to be installed on each side, as per the original GT40s. It'll look awesome.


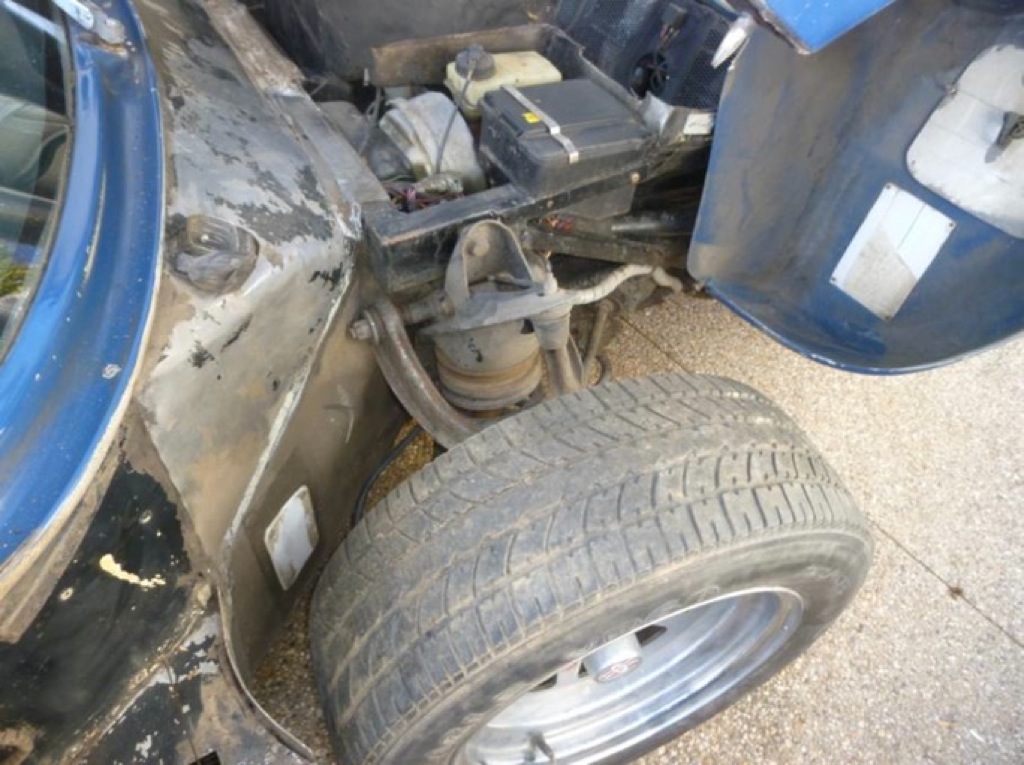
We've also been discussing pedals a fair bit. The old set up used a pedal box from a VW (we think). The previous owner was a tall guy so he needed the pedals as far forward as possible. Hence, the front of the chassis had been cut out to fit this pedal box. It doesn't look overly strong (you can see the cutout in the front shot above). We really can't go past floor mounted pedals like the OBP ones below. Since we're all short arses, we can get away with moving the pedals a bit closer to the seat.

Tim testing out the driving position. Check out the extra bracing in the side pods.

I emailed our ideas to my mate Jim and he updated the 3D model to play with pedal positioning.


Time to Call in Some Brute Force..
Now Tim, Dad and I are very much amateurs when it comes to welding, so we'd just tack welded everything into place. Fortunately, my Father in law, John, has over 30 years experience and loves to get his hands dirty on anything with an engine (particularly if it's a Chevy). He was down from Townsville during the last weekend and put in some serious hours in the garage! What a legend.
John at work..


Some shots after the clean-up. Not only did he finish off all the welds we'd tacked, he also fabricated some of the tricky angled members in the front and fixed a few other issues. The welds look awesome. John does some seriously nice work. Thanks very much mate.


John also adjusted the curved bar by rising it at the ends. You may notice in the pics below that there are tabs welded on top of the bar towards the ends. These look like they were added in a hurry to raise the body at the edges. John cut and raised the curved bar instead. This will allow us to cut off the tabs and bolt to the curved bar directly. Much better...
Once when John was visiting last year we removed the K-frame. This job was made a whole lot more painful, because the front anchor bolt had been welded in to the chassis and was too long to be able to lift the K-frame up and over the top. The only solution was to cut it. John has now fixed this by welding a nut in instead, so we can bolt downwards to anchor down the K-frame. Also notice that John fixed the pedal box cut out. This just keeps getting better :)

It's looking good from this view.

Suspension Painting
On Saturday, John had pretty much taken over the chassis, so Tim and I got on with other things. There was too much dust in the garage to do any engine work, so Tim worked outside and got stuck into painting the suspension parts that had been sitting waiting for a while. We were thinking of powder coating these, but it's quicker to do ourselves in an afternoon. Here's the finished products.

Seat Rails
While John and Tim were busy, I finally got around to mounting the seats on rails. I purchased rails from Autotecnica quite a while back, but haven't had a chance to get to them yet. They're quite low profile, so should work nicely. I mounted some steel bar inside the seat to bolt the rails to. I'll need to weld the bolts in properly, paint the flat bar to prevent it rusting and then tidy up the fibreglassing. They slide quite nicely, so that's a good start.


Some Motivation..
While looking at photos for this blog update, I discovered these old ones from when we first bought the car. It may have been a bit rough, but it's still one damn sexy car that will one day run again...


