Finally, it's time for an update!! A few people have been asking for updates. So it's definitely time. First up, you'll notice the blog has had an overhaul. My wife has started as a freelance graphic designer and has just got into blogging. She couldn't help herself.. Here's a free plug for her blog: Design + Burrow. She writes much better than I do :)
Alright, a few months have passed, so what have we been up to? We've all been pretty busy, but have made some progress. Although sometimes it feels like we're going backwards. You'll see why further down.
Tidy Up
First up, a tidy up. In my last update I said that I met with Reinhold the fibreglassing guy who is making out seat shells. He recommended that I knock up some supports for our fibreglass body parts. I was a bit worried about the front clip which was leaning up against a wall, so I knocked up this support. Should do the trick.


The Seats are here
Reinhold delivered the seat shells as promised and we are quite happy with them. They are amazingly light and strong. Of course, we had to test them out...
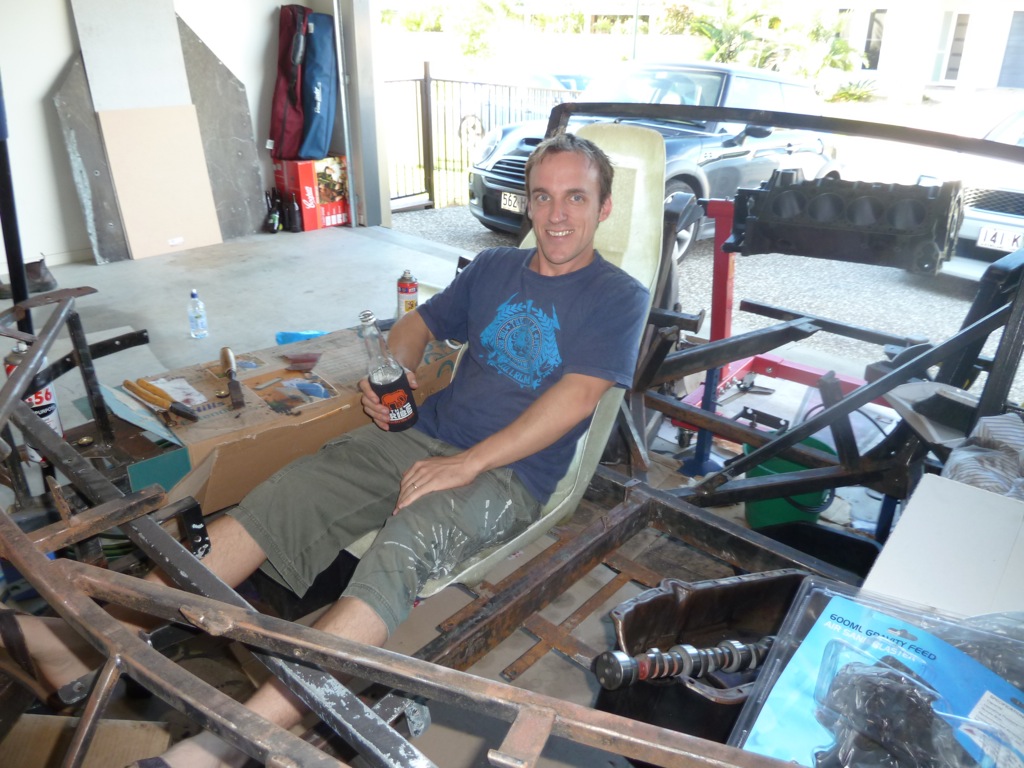

With the old seats Justin had no chance of fitting in the car. He was eager to see if he'll fit with the new ones. It's a tough call mate...

Last week I picked up some universal seat rails from Autotecnica. $54 each direct from the local distributor. Bargain! They look perfect for the job, too.
The Engine Parts are here
The engine parts were here from the US in less than a week. Amazing! This has inspired us to put the engine back together. The various parts are taking up half of the garage.


Dad has spent a few Saturdays now cleaning parts now. The latest was the valves and valve springs. I think we're just about there.


I suck at painting
After spending many hours stripping back the front suspension arms, I finally got around to spray painting them. Unfortunately, it did not go well. These photos speak for themselves..


The paint refused to bond to the metal in some places. The KBS Coating system we are using is 3 stages: Aquaklean, RustBlast and then paint. Stupidly, I used a tub of diluted Aquaklean that Tim had left in the garage from a few weeks back. I really should have made a new batch. It was way too dirty and is the likely cause of the terrible paint.
I decided that I'd have to strip these back and start again. Unfortunately for me, this paint is amazingly tough and cannot be stripped with a solvent. It had to be stripped with a wire wheel. 1 step backwards..

This next picture shows how tough this paint is. We've ended up with a perfect mould of our paint scoop. It looks like and feels like plastic. It should make an excellent seal for the chassis.

2 Steps Backwards..
A couple of weeks ago Dad was overseas and Tim and I decided we should strip the rear trailing arms to be painted. First we tackled the right hand side and it went quite easily. We needed a decent breaker bar to loosen the 34mm nut, but it budged. We were quite proud of ourselves and I was quite happy with the new bench and vice.

Next we tacked the left hand side. Initially, the nut turned fairly easy, but then got tough. We soon discovered that the left hand side is infact a reverse thread. Damn it, the damage to the Stub Axle thread was done. Considering Ford Granadas were never released in Australia, this part may not be easy to find. If anyone knows where I can get one, please let me know.
Not only did we ruin the thread on the stub axle..

We also managed to bend Dad's Stiltson. This thing is probably older than I am. Sorry Dad!

Not all was lost that day, we did manage to strip the paint back.

And Tim did a pretty awesome job of painting the springs. One of my mates saw them the other day and asked if they were brand new. Nope..


More parts cleaning
Last weekend I spent a good deal of time stripping the remainder of the suspension parts. Thankfully the bulk of it is done now and I can have another crack at painting this weekend.
I found this part interesting. The previous owner converted the rear brakes from drums to Alfa Romeo disc brakes. The photo below shows how they knocked up the caliper mounts. To me it appears they've found a small blank brake disc of the correct offset, drilled holes to match the wheel bearing housing, then cut out a notch and tapped holes to match the caliper. Pretty solid, yet simple design.


Well that's it from me for now. In the coming weeks we plan to: paint the suspension parts, rebuild the engine, mount the seats and then start painting the chassis. Exciting times!
Hopefully the next update will be sooner and shorter. Phew!