Thursday, 19 April 2012

Woohoo, Ordering Parts!

Well, we've put in some fairly consistent work over the last few weekends.

First up: The K-frame has been painted.

Here's how it looked after we removed the loose rust and hit it with a treatment of KBS Rustblast.


Tim getting stuck into the painting.


Check out the underside after it has been rustblasted. Awesome.


After the first coat.


The next day, I saw a sale on at Supercheap and thought this was as good chance to get a spray gun. I set up a DIY spray booth out of tarps and dust sheets and hit the K-frame with a second coat. It took about 5 minutes. Much better than the 30 mins it took to paint by hand the previous day.

Multipurpose ladder makes a good painting hanger.


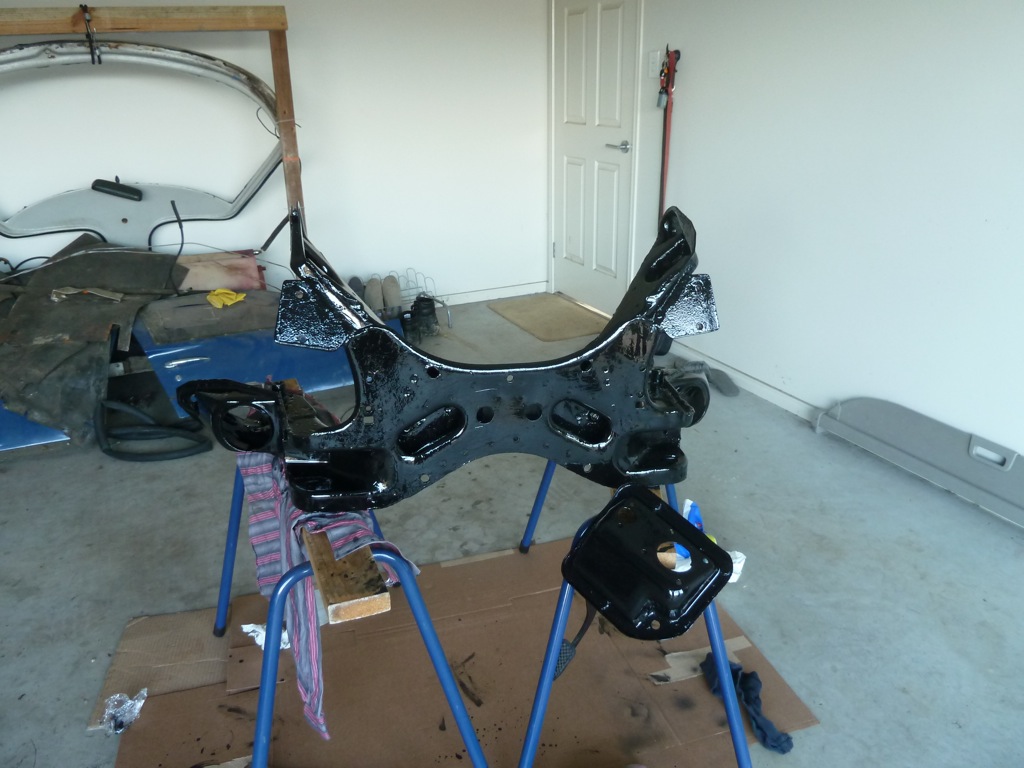
K-frame back at home on the chassis. It looks better than ever. This KBS paint is pretty awesome stuff.


Here's how it looked a few months ago...


While Tim got stuck into the K-frame, Dad got stuck into the pedal box. We noticed the brake master cylinder has a VW logo on it. Yet another manufacturer in the mix :)


Renee and I got stuck into the control arms. We actually uncovered a 1981 build date on the upper control arms. Always good to know. These are now at Fulcrum getting new bushes pressed in.


We also uncovered the first Ford logo we have seen on this Ford replica. Haha


We're now starting to shift our attention to the engine. The parts are using lots of storage space and the block has been sat waiting for a few months now. First up, Dad and I gave the block a clean up and took some measurements to satisfy ourselves of the clearances.


Over lunch Dad and I jumped on to Summit Racing and ordered new parts. We've gone for a re-ring kit, carby reco kit, main cap bolts, oil pump, lifters and Summit 1104 cam. It has 282/282 duration, 0.465/0.465 lift and is supposed to have an operating range of 2000-5600rpm. Believe it or not, these parts came to a toal $380 delivered! Parts from the US are so cheap. The cam alone was $50! We're still trying to decide what to do with the heads. We're thinking of replacing them with aftermarket units.

After lunch, Dad cleaned up the sump (yet more cleaning) and gave it a coat of engine enamel.


I stripped paint off the springs in preparation for painting. The list of parts to clean is endless.

Old seats, make a useful place to sit when cleaning parts.


New seats have been ordered!

Tuesday night I caught up with Reinhold from Whitepointer Fibreglass to order some seat shells. The shells should look something like this, but without the shoulder supports. Reinhold suggested the shoulder supports would make it too hard to get in and out of the car. The shells have been tested to meet the current ADRs, so should be all good. I've seen a set of Reinhold's seats in a Clubman and they look fantastic once upholstered by a good upholsterer.


Reinhold is quite an interesting guy and has heaps of experience building Clubmans over the years. Here's a few pics of his Lotus 11 replica. It's been on the road for 10 years now and is solely used for enjoyment at the track and on the roads. I sat in the driver's seat and it was very tight. Please excuse the low iPhone pic quality.


Reinhold's next chassis has been under construction for 2 years. He gets to it every now and then when he feels like it (and when it's too wet to go driving). All part of the fun. It was interesting checking out the front suspension. It uses Cortina uprights, just like our GT40, but has custom made adjustable control arms. He's even using Cortina brakes, which he thinks are quite adequate for the light-weight Clubman.


The welder is fixed!
You may remember a couple of blogs back that I said my eBay-spec Rossi Stick welder blew-up. I was quite disappointed since it was 18 days out of warranty and AGR Machinery wanted nothing to do with it (buyer beware!). Anyway, during the week I had another look at the electronics and started chasing back the control circuitry. Low and behold, I discovered a diode that had blown in half. You can see it in the pic just to the left of the black heat sink. I managed to get a compatible one from Jaycar, soldered it in and we're back in action. I was quite surprised myself, I was expecting carnage somewhere else on the board, but that was it. I didn't bother to investigate what might have caused it to blow in the first place. Possibly all the angle grinder dust that was in there (I became very familiar with the angle grinder when I was learning to weld).

I'm not sure if this is a common fault, but for the benefit of anyone Googling this, the diode in question is a HER407. I used a UF4007 from Jaycar that is compatible. Beware that there are dangerous voltages inside and this work should only be done by a competent person.


So that brings us up to date. It feels like quite a bit has happened in the last few weeks. We're all enjoying it as usual :)

Thursday, 29 March 2012

The first paint!

Well we just had an awesome weekend of GT40 activities. Saturday was a good working session and on Sunday we met up with the guys from Club GT40 for their monthly cruise.

OK Saturday first.... This was a turning point for the GT40. It saw its first paint!! OK, it was only some chassis parts, but for once we were not pulling things apart. The plan was just to test out the chassis paint that we have purchased. It was a good feeling to make some progression in the forwards direction.

The paint we are using is from KBS Coatings, which is a 4 step preparation and painting process. We have purchased the Chassis Coating Kit from their website. It was highly recommended on the Performance Forums.

Tim at work with the paint (step 4) after prepping the front chassis, which we have named the Cow Catcher. Being a med student, it was only right that he should be the one nominated to wear the rubber gloves...

Cortina uprights came up pretty good. A couple of minutes on the wire wheel grinder and then off to Tim for the KBS treatment. Before shot (right) was taken a few weeks back.

The cow catcher hanging off the garage door. We are very happy with this paint. It forms a thick protective layer and is self levelling, so looks fantastic once it's dried. Word of advice, IT DOES NOT COME OFF SKIN. I didn't do any painting, but somehow I got it on my hands. It's still there today, nearly a week later.


Tim had night shift the night before. 


Meanwhile Dad started to attack the brake master cylinder. Here's the pedal box. Judging by the stamp on the fluid reservoir, this has come out of a VW of some sort.


Hmmm rust inside. Imagine that...


So that's about it for Saturday. I also managed to do a much needed oil and plug change on the Stagea in time for the GT40 cruise. It's going much better now :)

GT40 Cruise
On Sunday we met up with Club GT40 for their monthly cruise. This one started out near Ipswich and meandered along the inland roads to Somerset Dam. Here's a couple of pics from the day. My mate Raj came along and will probably send me his SLR pics to put on the blog soon. In the meantime, here are a couple of pics...


The quality of these cars in absolutely top notch. I believe some of the cars have taken up to 6 years to build, but the end result really speaks for itself. These guys were very keen to give us much appreciated advice. Mum and Dad also came along. I think it was an eye opener for both of them. These cars certainly give us something to aim for...

1967 Le Mans Print


Last week marked 10 years since my wife and I first met. Check out what she gave me! A framed photo from the 1967 Le Mans race. Can't complain about that. Thanks Bella! You're awesome.


I've already put it up. It looks great.


Monday, 12 March 2012

What's going on?


I just realised that it's been a long time since my mast blog post. So what the hell is going on?

After a few trips away, we're back and getting stuck into the GT40 once again. The team are motivated and it's time to get on with it. The past few months have been a bit crazy for us. We all headed to the UK for Christmas. Tim and I and the girls spent a few weeks in Japan on the way back. I won't brag too much, but since this is an automotive blog I thought I might mention that we visited the Tokyo Autosalon and saw the Mazda 787B quad rotor Le Mans car in action. :)

Tim and I managed to get front row for the warm-up procedure. It is probably the best car I have ever heard and possibly the best automotive experience I have had. I took this video of the warm-up. If you watch when the car starts up the camera jumps. Yep, that was me crapping myself...

Anyway, what do we care about dirty rotaries, right? What about the GT40?

OK, well here's how it was looking a weeks ago. Yep, nothing left on that chassis whatsoever.


We've spent many hours with wire-wheels and have come to the conclusion that this is an endless task and we should send this thing away to be sandblasted, so that's the plan for the chassis.

Dead Welder

Unfortunately my Rossi stick welder blew up last weekend. It was just idling and suddenly went pop. It was 18 days out of warranty! It was an ebay purchase from AGR Machinery. I contacted them in the hope that they might offer some sort of compensation, instead their reply went along the lines of "Your product is out of warranty. You can purchase a new one on our website". What a joke! I replied with "I will be buying a new welder, but not from you guys. Thanks for nothing". So does anyone have any recommendations for a new welder? I'm thinking I should upgrade, since I'll have plenty of work for it on this project.

Front Suspension

In the mean time, Jim and I have been investigating the front suspension. When Jim developed the 3D model a few months back, he looked at the screen and said "this isn't gonna work". The model predicted that the camber would go positive under compression and negative under droop. This is not good for handling. Jim convinced me to remove the springs and do some tests.

I think I'll go into the technical details in another blog entry, but just briefly... Our suspension is from a Ford Cortina, but has Ford Granada stub axles. This is recommended in the original KCC build manual, since it gives you ventilated brake discs and larger calipers. What we discovered is that the Granada stub axle has different geometry to the original Cortina one. Here are a few tests we did last weekend. The tests confirmed exactly what the model was telling us. Not pretty...


We trialled some modifications and discovered that adding a spacer below the top ball joint pretty much fixed the geometry. We were measuring slightly negative camber through the normal operating range. 


I got on to the Performance Forums and put out the call for Cortina stub axles. Thankfully, an absolute legend by the name of Nathan (Ferdie) had a set lying around and donated them to the project. They turned out to be unused and also came with a set of blank hubs and brand new ball joints. You can see the difference between the two units here (the Cortina ones have light surface rust).


During the week Jim bought a fancy digital protractor (any excuse to buy toys). Thanks Jim! Here you can see the new protractor in action measuring 0.6 degrees negative camber.


Jim also bought a laser chalk. We used this to measure bump steer and found that bump steer should be fairly negligible at normal ride height. We also measured the steering angles and I calculated that it should have a turning circle of roughly 10m. Not too bad.

The only downside to switching back to Cortina stub axles is that we will need to find new brakes. Not really a downside, I think an upgrade is necessary anyway.

What now?

OK, now that the front suspension is solved, we got cracked into it and stripped it down. Some of bushes looked a bit average. Tim is now back in Brisbane and can finally do some of the dirty work. He got stuck into removing the loose surface rust.


Here's how it came up after an hour or so of work. Not too much more before we can test out the new chassis paint.


Last weekend Dad repaired one of the rear brake calipers and then decided to have a crack at polishing the inlet manifold (since this thing will be seen through the back window). On Sunday, Tim's girlfriend Renee was looking for something to do, so we gave her the inlet manifold to carry on with. It's looking pretty good.


So that's where we're at now. Jobs for the next few weeks/months:

  • Add some bracing to the chassis.
  • Find some seats and build seat mounts. Anyone have any recommendations for seats? We're stuck on this one.
  • Sandblast and paint the chassis.
  • Sort out some front brakes.
  • Rebuild the front suspension.
Hmmm that should keep us busy for a while....