Friday, 13 October 2017

It's time to get on with it!


Well, it's been a very long time between posts. A lot has happened for Dad, Tim and I during that time. Tim has been buried in studies and I have been busy with family, work trips away and this purchase....


Unfortunately the GT40 has sat gathering dust. Finally, a couple of weeks ago, the planets aligned and we were all free to pull it out and do some work on it.

First up, we started her up. Yep, the 350 still runs.

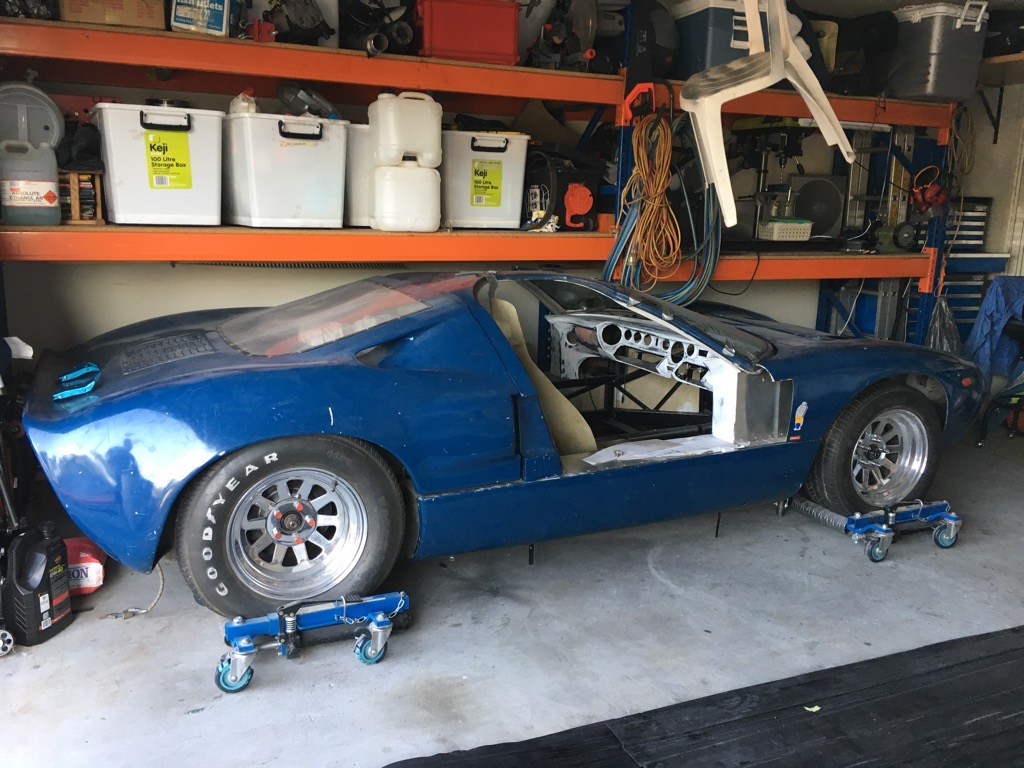
Next, we decided it was time to put the roof back on. This has been sitting around the back of the house for years.


It turns out the firewall fouls on some of the extra bracing we added, but we had already decided that the fibreglass firewall would be replaced with Aluminium.


After a short session with the angle grinder..


 We've left a small amount of the fibreglass in place that we will seal against the new aluminium firewall.

The next job was to build a frame around the front of the engine. Originally the car had a small cup fitted over the nose of the water pump, right near the driver's left elbow. We want to improve on this with a flat firewall. Here's the frame tacked in place.


And that was the end of day 1. She looks so much better with the roof back on.


After a bit of thought, we soon decided that we were not happy with the new frame. It eats up far too much of the limited cabin space. Our solution was to install an electric water pump and relocate the alternator to the lower right hand side. We've also decided that we will be installing an electric compressor for the air conditioning up the front. 

Within a week, I had this Davies Craig EWP-150 with SBC relocation kit on my door step. 


Julian approves...


So on the next weekend, I removed the old mechanical pump with some help from an offsider. Believe it or not, she was only a few weeks old when we started the 350 for the first time. She's now 4...


There is plenty of room to install the new pump behind the driver's seat.


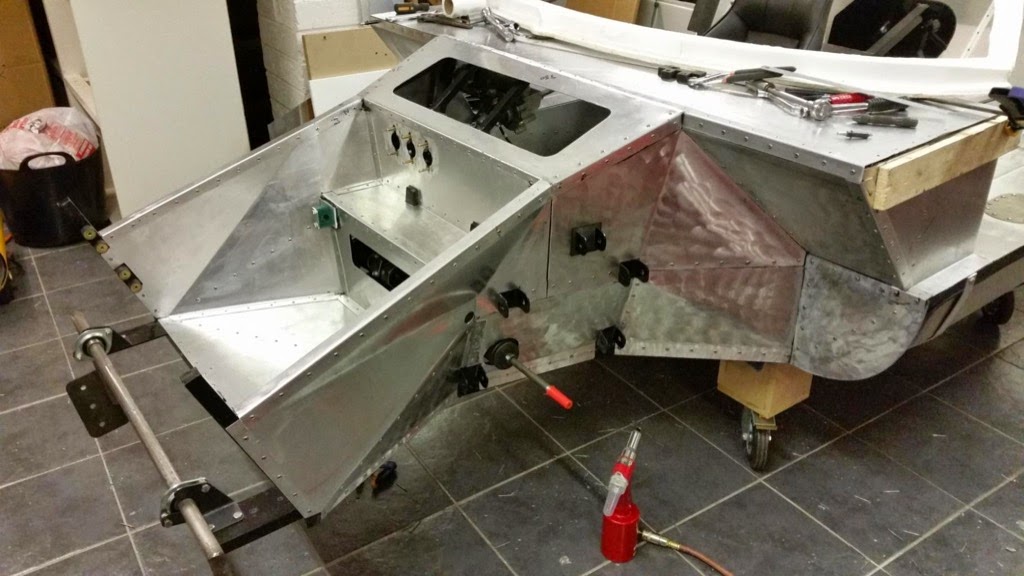
So on week 3, we got stuck into the remaining panelling. Tim did most of the work, while I finished off the damn fiddly passenger's side wheel arch.


I then started to look into the fuel fillers which I picked up a few years back. Originally this car had a fuel filler in the rear under the clamshell, but we will be installing them each side in front of the windscreen like they should be. We will need to cut out holes in the front body to fit the new fillers. I soon discovered that the front body has warped or its mounting points have moved a bit with the modifications we made to front end. We need to get this back into the correct position so that we cut holes in the right spot for the fuel fillers.

Last night, I ordered a pile of new goodies which are on their way to my door:
  • 140A alternator (required to power the air con compressor)
  • Alternator mounting bracket
  • Single crank pulley for ribbed belt (the old crank pulley is huge)
  • Engine air filter (finally)
Also, I picked up a handbrake mechanism from an R33 Nissan Skyline which should work well. Now that this has arrived, we can make up the centre tunnel and then get on with the rear firewall. 

It's been a long time, but we are enjoying getting stuck into the GT40 again. We just need to keep the momentum rolling now.


Sunday, 28 August 2016

Finally an update!

Well over a year has passed by at lightning speed and not much has happened with the GT40. So what the hell have we been doing? Well, it’s been one hell of year. First up, we did a massive family trip to the USA. One fortunate off-shoot of this, were these awesome fuel fillers that I managed to pick up off a US eBay seller. They’re not strictly true GT40 replicas, but they will look great and do the job. They arrived at the house we were staying at on the very last day we left. Phew!


On return from the trip, I hit the garage with the intention of getting stuck into the car, but discovered it was a bit of a mess and soon got side tracked into organising the garage so that it’s easier to work in and find things. These homebrew malt jars make good screw storage and the old fresh wort kit “cubes” can be cut open to store spray cans, etc.


Soon after this, I was sent on a last minute work trip to Zambia, which took us through to Christmas. Over Christmas time, I discovered my Stagea had a radiator leak. Whilst the radiator was out I decided to do the timing belt, plus a full service of every fluid in the car: 10 different fluids in total! These are the casualties of the dreaded RB26 harmonic balancer bolt. Eventually I hired a big torque wrench to crack it. It probably took me a month to get the car back on the road.


Once the Stagea was fixed, we decided it was time to upgrade the wife’s car. I twisted her arm (not that it needed much twisting) into getting an MY11 Subaru WRX STi. A quick trip down to Sydney and it was ours. We absolutely love it.


So finally, in recent times I have been able to do a small amount of work on the GT40. It feels damn good to get stuck into it again. Currently, I’m trying to build the panel that goes in the top of the passenger’s side wheel arch. It’s a complex shape with several bends.


First up, I was lazy and took the template from the driver’s side, saw that it looked close enough so decided to cut out a new panel from it. I soon discovered the sides are not symmetrical (no surprise really). So next I created a new template.


And cut it out. Bending these requires a lot of patience and a bit of improvisation. Normally, I can only do 1 or 2 bends in my little bending brake. The rest of the bends have to be done with improvised methods. Thank God I chose to use 1.2mm Aluminium.


Here’s the result partway through the process.


So after making this one, it turned out one of the angles was a bit off. It looks OK in the picture, but it wasn’t a good fit. No amount of clamping, trimming or forcing would make it work, so it was back out with the jig saw to cut the same panel a third time. Lesson learned here is to take the time with the template. If it is slightly off with card, then you can guarantee it won’t fit with Aluminium. Thankfully this time it fits. Third time lucky!


So that’s where we’re up to. Dad has taken the dash home, so he can work on that in his spare time. I’ve been sent away with work again, but am hoping to pick up the pace now and get things progressing. I just need to remind myself that it will be an absolute joy when it is eventually finished. I think the current plan is to keep knocking over the remaining panels in the front end, fit the fuel fillers and then put the roof back on so we can work on the rear firewall. The clutch is done, brakes are nearly done, throttle and steering are done. So I’m really hoping that we might be able to move it under its own power sometime soon.


Saturday, 28 February 2015

More Panelling

Things have been a bit slower lately, but Tim and I have managed to slip in a few hours here and there. Tim knocked up this panel.


You may remember from the last update that I had been battling with this panel in the wheel arch. I ended up trying to 'adjust' a fold which completely stuffed it up. It's time for a second attempt. I'm calling this panel the Prick Panel.


After frustration with the Prick Panel I decided to cut the panel beneath the windscreen. Tim did the tedious job of drilling and fitted it. We're pretty happy with how this one has turned out. The bar beneath the windscreen is not horizontal. The inside is higher than the outside and we were concerned whether we could make the one look good. With some careful hammering and lots of drilling, it's turned out pretty good. I'll have to take some more photos next time. Here's a couple of Tim at work.


Back to the Prick Panel... I gave it a bit more thought and decided I wanted to build in the end cap of the side pod. It requires a few extra angles and makes the panel even more complex, but will incorporate with the side pod panels better. This is as far as I got today on it. I'm pretty happy with the result.


Jeez, it's a prick of a panel. I'll have to do one on the other side, too..


 Fun times...

Saturday, 3 January 2015

More Panelling Progress

I thought I would share some more pics of the panelling process. In the hunt for pictures, I found these gems. Tim tightening the driveshaft bolts a few weeks back. Sometimes it pays to be a short arse.


So on with the panelling. Tim and I managed to have a good session on the car on New Years Day. Here are some pics of the process.

First up, we make the panel out of card. This takes ages for a complicated panel.


Next we transfer the template on to the aluminium. We've started using ballpoint pen on the Aluminium. Generally it works pretty well. It gives a nice thin line, but can be a little bit tricky to spot when cutting out the panel.


Next we cut out with a jigsaw. We've glued some vinyl to the underside of the jigsaw to stop it scratching the aluminium. We also use a bit of WD40 to help it slide.


After that it's off to the bending brake. We have an 800mm one. I keep forgetting to take pics. This complex panel wouldn't fit for this bend, so I had to make a DIY bending brake.


In the end it worked out pretty well.


However, there's one problem... We never realised this would leave a very large gap between the panel and body shell.


Previously the front of the car looked like this. There was no inner guard at all! The road grime would have flicked straight into the front of the door. That would explain why the doors are so dirty in that region. I guess this is one the many downsides of an old GT40 kit.


The photo below shows a modern kit. This one in particular is a GT Forte (thanks to Andrew on the GT40 forum). 


Notice the outer edge of this wheel arch panel extends further outwards than ours. I still haven't figured out if these panels seal against the hinged body on a modern kit or if there is always a gap. We'll have to give some thought about how we fix this gap on ours. I guess we have the options of extending the steel work further and making new panels, making an extra aluminium panel that extends into this region or fibreglassing a guard into the body work. You'll see what I mean about this in the pictures below.

Anyway, moving on... Here are some more pics of Tim's work on Thursday. He's finished off all the driver's side panels.


On Friday, Tim spent another day working on the car (unfortunately I had to work). Tim tackled the large panel in the wheel arch (behind the one shown above). Unfortunately Tim packed the car away before I could take photos. Here are a couple I squeezed through the wheel arch.


I'm pretty happy with how this has worked out....


The blue piece is attached to the hinged body work. On our KCC kit car, the body panels have inner wheel guards already fabricated in fibreglass. This is what you can see in blue above. The bonus of this is that you don't need to encase the whole front end in Aluminium. The blue fibreglass in the picture above was trimmed back quickly when we did the steel work. I'm quite happy with how this has mated up to the aluminium panel. It'll need a bit more tidying at a later date, but it's a good start. One option would be to do something similar for the panel behind the front wheel.

Anyway, that's enough from me. 

Thanks for reading.