Thursday, 8 August 2013

Close, but no cigar...


 The past month has been quite hectic, in particular with the birth of our baby daughter, Bianca.


Despite everyone telling me the baby would mean the end of the GT40 project, we've actually managed to make quite a bit of progress lately.

Since my Father-in-law John was in town to see the baby, we thought we'd put him to work. He's been welding and fabricating since before I was born, so it was awesome to get his help. We managed to sneak into the garage on quite a few occasions. A job that takes him 1 hour would take me 1 day. What a champion! 

One of the jobs we wanted to get started was fitting the steering column. The old column was looking pretty ordinary and was not fitted particularly well. 


After a trip around the wreckers with a tape measure, we discovered that a 2007 Toyota Yaris steering column would be a good fit. 


Now, before you flame me for the sacrilege of fitting a Yaris rack to a GT40, allow me to explain. First up, this rack has tilt AND reach adjustment. Secondly, it is collapsible in an accident. Thirdly, as a bonus, it has power assistance. For the grand total of $150 (including the steering computer) it was something we couldn't knock back. When you consider a Yaris weighs 1045kg, but has the engine over the front wheels, it shouldn't be too much stress to steer the GT40 which weighs about the same, but has bugger all weight over the front wheels.

The power assistance will take a bit of work to get it going since the steering computer requires speed and RPM signals sent via CAN bus. This will be a bit of a challenge for me, but is something I'll enjoy doing. Having power assistance is not completely mandatory and the car can easily be driven without it. Therefore, it can be turned on later down the track. No problem.

Fitting the column took a fair bit of trial and error on John's part, but didn't take that long to have it in and welded in the right position.


On to the next hurdle. The cooling system is done! Fortunately, my TIG welding skills seem to have improved enough for me to be able to braise with no filler rod. However, adding filler rod to the equation still leads to ugly welds. More practice needed. I've managed to modify an old sewing machine pedal for use with the welder. This has made the welds much easier to control.


While I was doing the welding, Tim got cracking with the remaining jobs on the engine with the aim of firing her up ASAP. In goes the first oil. We gave Tim a hard time about his very 90s shorts. :)


The engine was then ghetto-wired to an old battery and hooked up to a jerry can. Pushed out to the driveway and attempted to start. The good news was that it cranks, has oil pressure, is getting fuel and fires occasionally. The bad news is that it's pretty much firing on one cylinder only. We tried different coils, checking the timing, checking the firing order, adjusting the carby, but have had no real improvements. In the end, we've put this down to a dodgy distributor. It's still the original distributor, so it's no surprise. Fortunately, John has a brand new one in Townsville that will be here this weekend for our second try. Fingers crossed I have videos soon.

Tuesday, 25 June 2013

Cooling System and Brakes

I just realised it's been ages since the last blog update, so it's well and truly time... Unfortunately, the past month or so has been slow for progress with Tim heading on an ultimate man's trip of the world (Monaco GP, Nurburgring and Montreal GP), Dad heading to India for work and then a baby shower thrown in the middle (5 weeks until our baby is due).

Anyway, work has progressed slowly. First up, this load of toys arrived from the US. Cleckos are in preparation for the panelling work.


We decided to change the thermostat housing to a filler since this is the highest point of the cooling system. One slight problem. The outlet is pointing straight at the new horizontal bar we added behind the seats.


Fortunately, my mate Jim offered to drop it into Scott at Cleveland Exhaust to get the outlet direction changed (apologies for the dark photo). Scott did a great job and thanks to Jim for sorting it out for me.


Next job, I started tackling the coolant piping. This is my first attempt at TIG welding stainless. The TIG welder I have is an old WIA DC unit I bought off a guy at work. It doesn't have the ramping, post gas-flow and current control pedal of the modern units. I soon discovered that current control while welding would be a useful feature.

After opening up the welder, I discovered that it could be easily and safely altered for remote operation from a pedal or hand control. I had a bit of a chat with Jim about my ideas for modifying the welder and before I knew it, he was on my door step with a prototype Arduino circuit and hand controller made from a throttle position sensor. After a few hours in the garage, we had it up and running with basic current control from the hand controller. For the next phase of the upgrade we will add automatic gas stop/start using an old boost control solenoid and probably a foot pedal. Since it's controlled by an Arduino, it's easy to add current ramp up / ramp down, gas post-flow time and current shut-off. I'd really like to add HF starting and AC functionality, but these aren't so easy. These are photos of the prototype. Don't worry, we'll upgrade the cables and tidy the installation when it's all up and running. I'll post more on this once it's finished.


On Saturday Tim came around and I really wanted to get on with some welding. So for now, I put the system back together with the basic hand control only. It worked fine. Being able to vary the current made the welding much easier.


 This shows my first bit of pipe. The bottom weld was done before the new current control system. The top weld was done afterwards. I'll admit, the welds are far from perfect, but they'll do the job.

New pipe in place.


While I messed around with the welder, Tim fitted the reconditioned rear brake calipers. These are actually the calipers that came with the car. They are originally the front brakes off an Alfasud (who the hell puts a handbrake on the front?). Tim tells me these are also used on the rear of a Ferrari 308 GTS, so they can't be that bad.

I dropped them into BrakesPlus Capalaba to be reconditioned. The owner of the store also owns a GT40 and was very helpful. Unfortunately, one of the calipers was missing a part of the handbrake mechanism. Luckily I tracked down a new caliper in the UK and had it delivered to our Grandmother's place. While Tim was visiting, he chucked it in his bag (taking him to 0.5kg below his luggage limit) and then lugged it through the US and Canada. Haha. Thanks Tim.


It's a pretty tight fit. The cable will need to be replaced.


As you may have noticed, the garage is getting pretty cramped. What do you with an old desk corner? Well, it makes a perfect shelf to store tall items like gold clubs and kite surfing gear. It's given me a good 1.5m of wall space.


Anyway, that's it from me. Hopefully we can keep making decent progress. 

Tuesday, 23 April 2013

Back on Wheels!

Well, we just had an excellent weekend of car work and finally reached a milestone. For the first time in nearly 2 years, the GT40 is back on its wheels again!

We ordered these nice Gaz shocks from the UK. Tim ordered them months ago. I guess Cortina parts are not in high demand...


Interestingly, our KCC kit manual recommends Cortina front shocks in the front and rear. I guess due to the extra weight over the rear wheels, it makes sense. The lower mounts had to be cut-off and the lower tube drilled out to mount these.


Here's how the front looks. The shocks needed a small amount of modification of the top mount to get them in. I guess this is a difference with the South African Cortina K-Frame.


Back on the wheels, she's definitely sitting high in the front at the moment. There is next to no weight in the front, so I guess that's expected. At the moment the suspension feels quite soft in the rear and hard in the front. We'll sort that out later if it's an issue.


Tim also painted the radiator support frame, so the front should be going back together soon. It sure is nice to be making progress in the forward direction.

Thursday, 4 April 2013

Fun with a Pipe Bender

Well the Easter weekend has gone and passed and I can happily say we had a great time working on the car. We managed to get 2 days of work on it.

First up, I purchased a cheap pipe bender, some 1.5" stainless pipe and a bending brake for the panels (coming soon).


After practicing on some scrap metal, we discovered the press benders are not as easy as they look. It is quite easy to crush a piece of pipe. Anyway, after a bit of Googling and experimentation, this is what we found:
  • Fill the pipe with wet sand. Jam something in there so you can keep the sand under pressure.
  • Grease up the shoe and rollers.
  • Go nice and slow and keep an eye on it.
After a few hours (yep, we work slow), we had two pipes done with minimal crushing in the bends. We're pretty happy with the result.


I'm glad to say that I'm recovering quickly from the hernia operation, so while Tim was bending pipes, I was busy finishing the welding of the radiator support. 


On the second day, Tim got out the Satan Spawn (aka Paint Stripper) and cleaned up some of the interior panels. It's not a nice job at all and somehow Tim always gets the messy jobs... The panels came up pretty good. See the pic below. We haven't decided yet if we're going to carpet the interior or leave it as exposed metal :)


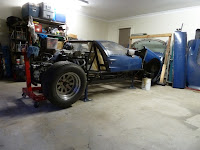
Finally I gave the garage a much-needed clean. I couldn't help but take a few pics of the GT40 when it's not surrounded by mess. Loving it!


Well, that's it for now. Next up, we need to finish off the rest of the pipework and start the panelling. The pipework around the thermostat is going to be very tricky. We've added a new bar across the back of the cabin and it's going to make things a bit tight in that area.