Tuesday, 19 June 2012

1 Step Forward, 2 Steps Back...

Finally, it's time for an update!! A few people have been asking for updates. So it's definitely time. First up, you'll notice the blog has had an overhaul. My wife has started as a freelance graphic designer and has just got into blogging. She couldn't help herself.. Here's a free plug for her blog: Design + Burrow. She writes much better than I do :)

Alright, a few months have passed, so what have we been up to? We've all been pretty busy, but have made some progress. Although sometimes it feels like we're going backwards. You'll see why further down.

Tidy Up

First up, a tidy up. In my last update I said that I met with Reinhold the fibreglassing guy who is making out seat shells. He recommended that I knock up some supports for our fibreglass body parts. I was a bit worried about the front clip which was leaning up against a wall, so I knocked up this support. Should do the trick. 


The Seats are here

Reinhold delivered the seat shells as promised and we are quite happy with them. They are amazingly light and strong. Of course, we had to test them out...


With the old seats Justin had no chance of fitting in the car. He was eager to see if he'll fit with the new ones. It's a tough call mate...


Last week I picked up some universal seat rails from Autotecnica. $54 each direct from the local distributor. Bargain! They look perfect for the job, too.

The Engine Parts are here

The engine parts were here from the US in less than a week. Amazing! This has inspired us to put the engine back together. The various parts are taking up half of the garage.


Dad has spent a few Saturdays now cleaning parts now. The latest was the valves and valve springs. I think we're just about there.


I suck at painting

After spending many hours stripping back the front suspension arms, I finally got around to spray painting them. Unfortunately, it did not go well. These photos speak for themselves..


The paint refused to bond to the metal in some places. The KBS Coating system we are using is 3 stages: Aquaklean, RustBlast and then paint. Stupidly, I used a tub of diluted Aquaklean that Tim had left in the garage from a few weeks back. I really should have made a new batch. It was way too dirty and is the likely cause of the terrible paint.

I decided that I'd have to strip these back and start again. Unfortunately for me, this paint is amazingly tough and cannot be stripped with a solvent. It had to be stripped with a wire wheel. 1 step backwards..


This next picture shows how tough this paint is. We've ended up with a perfect mould of our paint scoop. It looks like and feels like plastic. It should make an excellent seal for the chassis.


2 Steps Backwards..

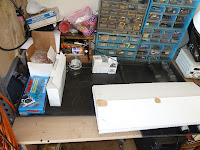
A couple of weeks ago Dad was overseas and Tim and I decided we should strip the rear trailing arms to be painted. First we tackled the right hand side and it went quite easily. We needed a decent breaker bar to loosen the 34mm nut, but it budged.  We were quite proud of ourselves and I was quite happy with the new bench and vice.


Next we tacked the left hand side. Initially, the nut turned fairly easy, but then got tough. We soon discovered that the left hand side is infact a reverse thread. Damn it, the damage to the Stub Axle thread was done. Considering Ford Granadas were never released in Australia, this part may not be easy to find. If anyone knows where I can get one, please let me know.

Not only did we ruin the thread on the stub axle..


We also managed to bend Dad's Stiltson. This thing is probably older than I am. Sorry Dad!


Not all was lost that day, we did manage to strip the paint back.


And Tim did a pretty awesome job of painting the springs. One of my mates saw them the other day and asked if they were brand new. Nope..


 More parts cleaning

Last weekend I spent a good deal of time stripping the remainder of the suspension parts. Thankfully the bulk of it is done now and I can have another crack at painting this weekend.


I found this part interesting. The previous owner converted the rear brakes from drums to Alfa Romeo disc brakes. The photo below shows how they knocked up the caliper mounts. To me it appears they've found a small blank brake disc of the correct offset, drilled holes to match the wheel bearing housing, then cut out a notch and tapped holes to match the caliper. Pretty solid, yet simple design.


Well that's it from me for now. In the coming weeks we plan to: paint the suspension parts, rebuild the engine, mount the seats and then start painting the chassis. Exciting times!

Hopefully the next update will be sooner and shorter. Phew!

Thursday, 19 April 2012

Woohoo, Ordering Parts!

Well, we've put in some fairly consistent work over the last few weekends.

First up: The K-frame has been painted.

Here's how it looked after we removed the loose rust and hit it with a treatment of KBS Rustblast.


Tim getting stuck into the painting.


Check out the underside after it has been rustblasted. Awesome.


After the first coat.


The next day, I saw a sale on at Supercheap and thought this was as good chance to get a spray gun. I set up a DIY spray booth out of tarps and dust sheets and hit the K-frame with a second coat. It took about 5 minutes. Much better than the 30 mins it took to paint by hand the previous day.

Multipurpose ladder makes a good painting hanger.


K-frame back at home on the chassis. It looks better than ever. This KBS paint is pretty awesome stuff.


Here's how it looked a few months ago...


While Tim got stuck into the K-frame, Dad got stuck into the pedal box. We noticed the brake master cylinder has a VW logo on it. Yet another manufacturer in the mix :)


Renee and I got stuck into the control arms. We actually uncovered a 1981 build date on the upper control arms. Always good to know. These are now at Fulcrum getting new bushes pressed in.


We also uncovered the first Ford logo we have seen on this Ford replica. Haha


We're now starting to shift our attention to the engine. The parts are using lots of storage space and the block has been sat waiting for a few months now. First up, Dad and I gave the block a clean up and took some measurements to satisfy ourselves of the clearances.


Over lunch Dad and I jumped on to Summit Racing and ordered new parts. We've gone for a re-ring kit, carby reco kit, main cap bolts, oil pump, lifters and Summit 1104 cam. It has 282/282 duration, 0.465/0.465 lift and is supposed to have an operating range of 2000-5600rpm. Believe it or not, these parts came to a toal $380 delivered! Parts from the US are so cheap. The cam alone was $50! We're still trying to decide what to do with the heads. We're thinking of replacing them with aftermarket units.

After lunch, Dad cleaned up the sump (yet more cleaning) and gave it a coat of engine enamel.


I stripped paint off the springs in preparation for painting. The list of parts to clean is endless.

Old seats, make a useful place to sit when cleaning parts.


New seats have been ordered!

Tuesday night I caught up with Reinhold from Whitepointer Fibreglass to order some seat shells. The shells should look something like this, but without the shoulder supports. Reinhold suggested the shoulder supports would make it too hard to get in and out of the car. The shells have been tested to meet the current ADRs, so should be all good. I've seen a set of Reinhold's seats in a Clubman and they look fantastic once upholstered by a good upholsterer.


Reinhold is quite an interesting guy and has heaps of experience building Clubmans over the years. Here's a few pics of his Lotus 11 replica. It's been on the road for 10 years now and is solely used for enjoyment at the track and on the roads. I sat in the driver's seat and it was very tight. Please excuse the low iPhone pic quality.


Reinhold's next chassis has been under construction for 2 years. He gets to it every now and then when he feels like it (and when it's too wet to go driving). All part of the fun. It was interesting checking out the front suspension. It uses Cortina uprights, just like our GT40, but has custom made adjustable control arms. He's even using Cortina brakes, which he thinks are quite adequate for the light-weight Clubman.


The welder is fixed!
You may remember a couple of blogs back that I said my eBay-spec Rossi Stick welder blew-up. I was quite disappointed since it was 18 days out of warranty and AGR Machinery wanted nothing to do with it (buyer beware!). Anyway, during the week I had another look at the electronics and started chasing back the control circuitry. Low and behold, I discovered a diode that had blown in half. You can see it in the pic just to the left of the black heat sink. I managed to get a compatible one from Jaycar, soldered it in and we're back in action. I was quite surprised myself, I was expecting carnage somewhere else on the board, but that was it. I didn't bother to investigate what might have caused it to blow in the first place. Possibly all the angle grinder dust that was in there (I became very familiar with the angle grinder when I was learning to weld).

I'm not sure if this is a common fault, but for the benefit of anyone Googling this, the diode in question is a HER407. I used a UF4007 from Jaycar that is compatible. Beware that there are dangerous voltages inside and this work should only be done by a competent person.


So that brings us up to date. It feels like quite a bit has happened in the last few weeks. We're all enjoying it as usual :)