I just realised it's been ages since the last blog update, so it's well and truly time... Unfortunately, the past month or so has been slow for progress with Tim heading on an ultimate man's trip of the world (Monaco GP, Nurburgring and Montreal GP), Dad heading to India for work and then a baby shower thrown in the middle (5 weeks until our baby is due).
Anyway, work has progressed slowly. First up, this load of toys arrived from the US. Cleckos are in preparation for the panelling work.
We decided to change the thermostat housing to a filler since this is the highest point of the cooling system. One slight problem. The outlet is pointing straight at the new horizontal bar we added behind the seats.
Fortunately, my mate Jim offered to drop it into Scott at Cleveland Exhaust to get the outlet direction changed (apologies for the dark photo). Scott did a great job and thanks to Jim for sorting it out for me.
Next job, I started tackling the coolant piping. This is my first attempt at TIG welding stainless. The TIG welder I have is an old WIA DC unit I bought off a guy at work. It doesn't have the ramping, post gas-flow and current control pedal of the modern units. I soon discovered that current control while welding would be a useful feature.
After opening up the welder, I discovered that it could be easily and safely altered for remote operation from a pedal or hand control. I had a bit of a chat with Jim about my ideas for modifying the welder and before I knew it, he was on my door step with a prototype Arduino circuit and hand controller made from a throttle position sensor. After a few hours in the garage, we had it up and running with basic current control from the hand controller. For the next phase of the upgrade we will add automatic gas stop/start using an old boost control solenoid and probably a foot pedal. Since it's controlled by an Arduino, it's easy to add current ramp up / ramp down, gas post-flow time and current shut-off. I'd really like to add HF starting and AC functionality, but these aren't so easy. These are photos of the prototype. Don't worry, we'll upgrade the cables and tidy the installation when it's all up and running. I'll post more on this once it's finished.


On Saturday Tim came around and I really wanted to get on with some welding. So for now, I put the system back together with the basic hand control only. It worked fine. Being able to vary the current made the welding much easier.
This shows my first bit of pipe. The bottom weld was done before the new current control system. The top weld was done afterwards. I'll admit, the welds are far from perfect, but they'll do the job.
New pipe in place.
While I messed around with the welder, Tim fitted the reconditioned rear brake calipers. These are actually the calipers that came with the car. They are originally the front brakes off an Alfasud (who the hell puts a handbrake on the front?). Tim tells me these are also used on the rear of a Ferrari 308 GTS, so they can't be that bad.
I dropped them into BrakesPlus Capalaba to be reconditioned. The owner of the store also owns a GT40 and was very helpful. Unfortunately, one of the calipers was missing a part of the handbrake mechanism. Luckily I tracked down a new caliper in the UK and had it delivered to our Grandmother's place. While Tim was visiting, he chucked it in his bag (taking him to 0.5kg below his luggage limit) and then lugged it through the US and Canada. Haha. Thanks Tim.
It's a pretty tight fit. The cable will need to be replaced.
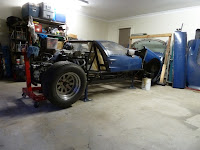
As you may have noticed, the garage is getting pretty cramped. What do you with an old desk corner? Well, it makes a perfect shelf to store tall items like gold clubs and kite surfing gear. It's given me a good 1.5m of wall space.
Anyway, that's it from me. Hopefully we can keep making decent progress.


